

















1947-1955 (1st Series) GMC & Chevy Truck
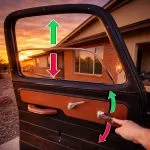
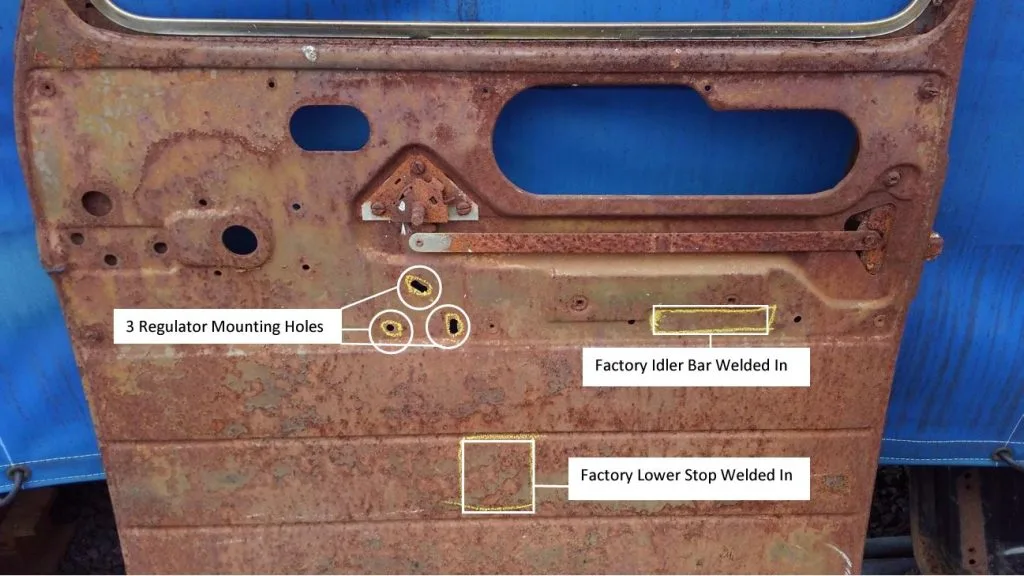
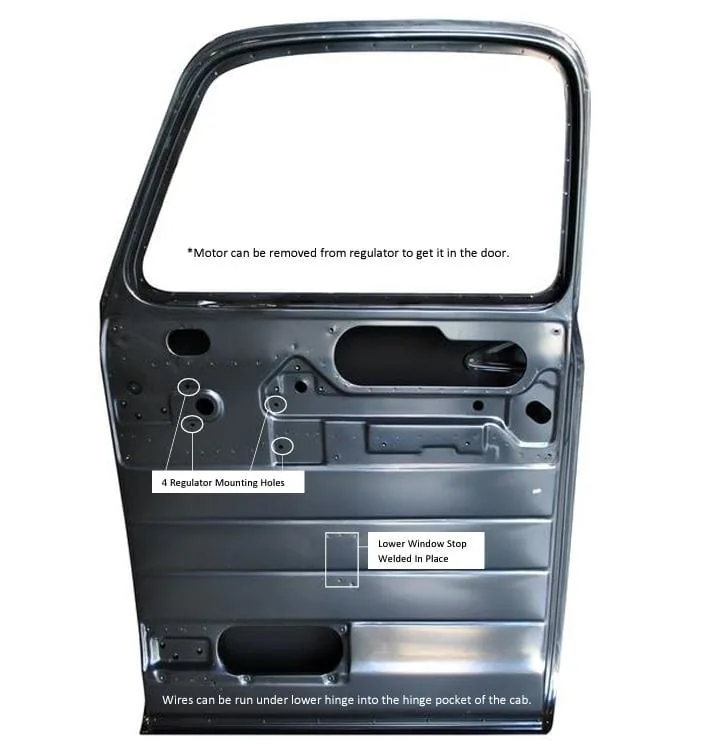
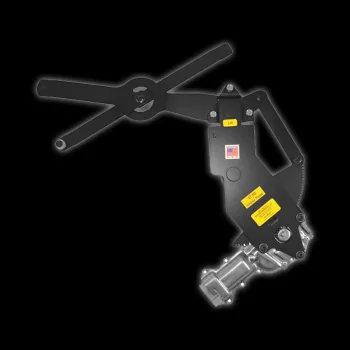
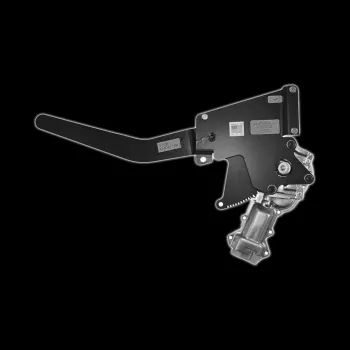
Fitting 1947-54 power windows takes a little more patience than the later trucks, because the door has less room inside. Our kits for 1947-54 Advance Design doors replace the crank regulator in an Advance Design door with an electric regulator and motor. There are two kits, one for the 1947-1950 doors and one for the 1951-1955 first series doors, and the photos below show each mounting position. First, read the access note, because the motor comes off the regulator to get it into the door. Then follow the photos and the harness steps.
Tools you will need
- Door panel removal tool and basic hand tools
- Drill with a 5/32″ bit and a 10-32 tap for the harness clip
- 7/8″ hole saw or step bit for the kick panel grommet
- Wire strippers, crimps and a test light or multimeter
Due to limited access space in the 47-55 (1st Series) Chevy truck, remove the motor from the regulator before installing:
- Remove the motor from the regulator — it’s held on with three button-head screws.
- Insert the regulator into the door.
- Reattach the motor to the regulator through the access hole.
1947-54 power windows mounting positions
1947-1950 Chevy Truck — Right Side
1951-1955 (1st Series) Chevy Truck — Right Side
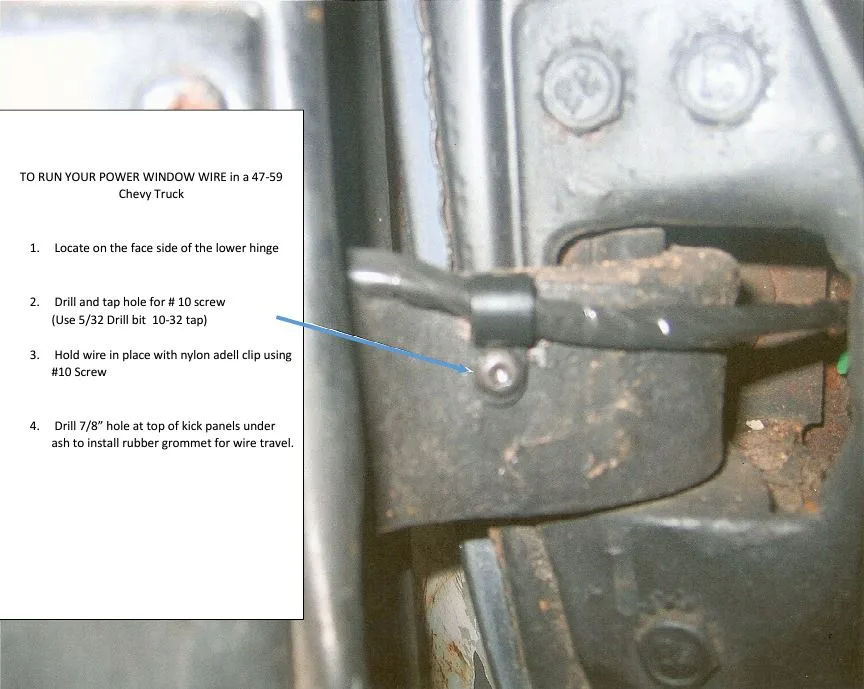
Running the power window kit harness through the door
- First, locate the mounting point. Find the face side of the lower door hinge.
- Drill and tap. Drill and tap a hole for a #10 screw (use a 5/32″ drill bit and 10-32 tap).
- Secure the wire. Hold the wire in place with a nylon Adel clip using the #10 screw.
- Finally, route into the cab. Drill a 7/8″ hole at the top of the kick panel under the dash and install a rubber grommet for wire travel.
Wiring and switch tips
- First, disconnect the battery before any wire goes into the door.
- Bench test each motor on the truck battery before the regulator goes in. It is far easier to swap a motor on the bench than inside a door.
- Fuse the circuit at the source. A 20 amp fuse covers a pair of power window motors on most kits.
- Finally, test the switches before the door panel goes back on. If a window runs the wrong way, swap the two motor wires at the switch.
1947-54 power windows fitment notes
Every one of these doors has a different history, so expect to trim a bracket or move a hole once in a while. Also, run the glass up and down by hand before the motor is connected, because a stiff channel will stall a motor that is otherwise fine. New felt run channels make a bigger difference than most people expect.
Access is tight in the Advance Design door, which is worth knowing before you start. If you are not sure which year your cab is, our Chevy truck VIN decoder reads the serial plate. Aluminum door panels, bead rolled firewalls and billet door handles cut for the same cab are in our 47-54 truck parts collection.
For any questions or concerns with your install, don’t hesitate to email us at support@lsfab.com
0 Comments