















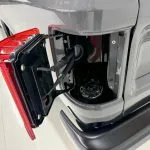

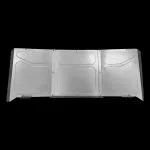



Fitting the no-weld tailgate latch kit to a 1976-1987 Squarebody Chevrolet or GMC — identifying the sides, trimming for the latch, setting the nutsert and hanging the new cables. It reuses your factory handle and rods.

The squarebody tailgate latch kit swaps the factory rotary latches for bear claw latches, and it needs no welding. Tre5 Customs filmed the video above, and it walks through the no-weld latch set for 1976-87 trucks from start to finish. Also, you can watch it on YouTube at full size. The written steps below follow it in order. Allow about an hour.
Tools you will need
- Screwdriver, pliers, sockets and wrenches including a 1/2” wrench and a 7/16” socket
- Drill with 1/8” and 25/64” bits
- Die grinder or cut-off tool for the trimming
- Marker
- A couple of zip ties
What is in the kit
- (2) bear claw latches, with covers
- (2) raw steel tailgate latch mounts
- (2) raw steel bed bracket and cable mounts, with striker plates
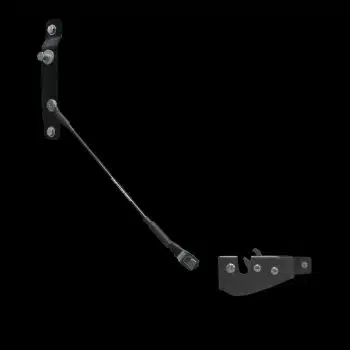
- (2) tailgate cables
- Templates
- Mounting hardware, including a bolt, nut and washer you can use to set the nutserts. Your factory latch hardware is still required.
What is in the squarebody tailgate latch kit
Everything below comes in the box, and the squarebody tailgate latch kit reuses your factory handle and rods.
Squarebody tailgate latch kit install steps
Work one side at a time, because the squarebody tailgate latch kit is handed and the two sides are not interchangeable.
- Sort the latches into sides. They are marked with notches on the bracket — two notches is the passenger side, one notch is the driver side.
- Remove the factory hardware. Four screws hold the tailgate trim on. With the trim out, squeeze the clip holding the rod with a pair of pliers and push it out, then remove the handle. Pull the two bolts and slide the old latch out.
- Check how the new plate sits. Tailgates changed through the Squarebody years. Some need a small notch trimmed so the mounting plate sits flush against the inside of the tailgate.
- Mark the latch opening. Working near the ridge where the panel goes flat and then turns, mark a hole at the top and one at the bottom, join them down into the pocket that is already there, and cut that section out to make room for the latch spring.
Fit the latches
- Next, assemble the latch. Fit the cover to the latch and start the supplied 1/4-20 bolts, then test fit it in the opening.
- Drill for the nutsert. Some tailgates already have a hole here and only need it opened up. Start with a 1/8” pilot, step up through a middle size, and finish at 25/64” — that is the size the nutsert needs.
- Set the nutsert. If you do not own a nutsert tool, use the bolt, nut and washer in the kit: hold the 1/2” wrench so it cannot turn and tighten the bolt with a 7/16” socket until the nutsert pulls up tight.
- Transfer the factory rod. Take the rod off the old latch and feed it into the new latch from the back side. A zip tie holds it in place while you fit the latch — it is only needed for the install, not afterwards.
- Check the striker area for your year. 1976-1980 tailgates need trimming at the latch and again up at the striker; the later gates need less. Position the latch, find where it lands between the notches, and mark the striker from there.
Cables and strikers
- Test fit everything, then paint. Confirm that the latches work and the clearances are right before you finish anything. The brackets ship in raw steel so you can paint match or powder coat them.
- After that, build up the cable ends. There are two spacers: the 5/16” one goes on the tailgate side, the 3/8” one on the bed side. Put the fender washer on the bolt, then the cable, with the shoulder of the spacer sitting in the hole of the cable.
- Get the striker plate the right way round. The narrower side goes up and the wider side down, the smaller end nearest the hole faces the rear, and the flat face goes against the bedside for clearance. Which way the cable runs depends on which tailgate you have.
- Then bolt the plates to the bedside. The holes are oversized on purpose. Snug the cable up, snug the striker bolt down, then close the tailgate and adjust from there.
- Reinstall the handle and make the final adjustments with the gate opening and closing.
Everything mounts to existing holes apart from the one hole per side that gets opened up for the nutsert. The only cutting is the tab in the tailgate jamb area, which the new latch mounting plate then covers. Take your time on that cut and the factory paint comes through untouched.
The latch kit pairs with the rest of our Squarebody tailgate parts. Our trunnion kit guide and tailgate saver guide cover the other jobs, and savers, cables and trunnions are in the 73-87 Squarebody truck parts collection.
For any questions or concerns with your install, don’t hesitate to email us at support@lsfab.com
0 Comments