















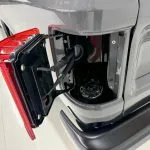




Fitting the stainless steel and Delrin Silent ‘Gate trunnion hinges to a 1973-1987 Chevy or GMC tailgate — the procedure is the same across the run, but the kit and one step change with the year and with whether your tailgate is removable.
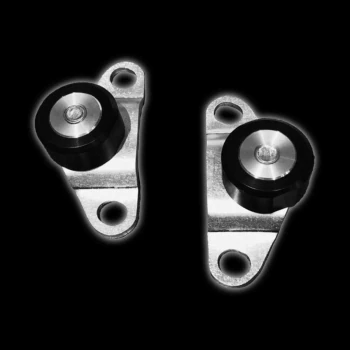
A 1973-87 tailgate trunnion that has worn oval lets the gate sag and bind. The Silent Gate set for 1973-87 trucks replaces the worn factory trunnions with stainless steel pins running in Delrin bearings. Trunnions changed part way through the run, which is why there is a different instruction sheet for each combination — all of them are at the foot of this page.
Find your 1973-87 tailgate trunnion kit first
- 1973-1974 fleetside, and every stepside 1954-1987: four-piece set.
- 1975-1980 fleetside, removable or non-removable: six-piece set.
- 1981-1987 fleetside, removable or non-removable: four-piece set.
Not sure which year your truck is? Run the serial number through our VIN decoder.
Removable and non-removable tailgates take the same bearings but come apart differently, and that changes one step near the end. Check which one you have before you start.
Stainless steel galls against itself. Some anti-seize is applied to the trunnions at the factory, but you must add more to your bolts — original mounting hardware or new stainless replacements, it makes no difference. Do not even try the bolts until anti-seize is on them.
Tools you will need
- Sockets and wrenches for the factory trunnion bolts
- A small screwdriver, to hold the pin in its groove while you tighten
- A hammer, for light seating of the bearings
- A grinder or sandpaper, if a bearing needs to sit deeper
- Anti-seize grease
- A second pair of hands for the tailgate
Remove the old 1973-87 tailgate trunnion set
- Take the tailgate off by removing the old trunnion bracket on each side.
- Clean the pockets. Before the new Delrin bearings go anywhere near the tailgate, make sure the flange pockets are free of dirt, paint debris and rust.
Fit the 1973-87 tailgate trunnion bearings
- Line up the flats front to back. Install the female Delrin bearing on each side of the tailgate with its flat edges running front to back — that is what stops it spinning in the pocket later.
- Tap it in lightly. A very light tap with a hammer is usually all it needs. Sand the edges if it wants to go in easier.
- Firm, not crushed. It should slide in tight, but not so tight that the hole squeezes smaller. The stainless pin has to move freely in it afterwards — check that it does.
- Check it sits flush. The Delrin should finish flush with the tailgate edge or just below it. If it stands proud, take it out and sand the backside — the side with no bevel — with a grinder or sandpaper.
- Snug, not tight. Once both Delrin pockets are in, tighten only enough to stop the Delrin spinning in the tailgate.
Reproduction tailgates can measure a little off the original and may need extra attention while fitting. Past damage to the tailgate or to the bed mounting area will also change how easily this goes together and can call for additional work to get it right.
Install the pins and hang the tailgate
- Non-removable kits only: you will need to take the hinge assembly off on the bed side, then slide it down the inner bed slot to the bolt holes, line the trunnion hinge up with them and hand-start the bolts. Leave them loosely tightened for now.
- Install the first stainless pin. Fit the pin — the pivot point — on one side of the bed. Hold it with a small screwdriver in the groove on the pin so it cannot spin while you tighten it properly.
- Slip the second pin in. Feed the other pin into the other side of the tailgate and hold it there. You will need to catch it with the bolt threads as the tailgate goes on, so have someone hold the gate for you — it makes the whole job easier. Use the screwdriver in the groove again while tightening.
- Set the fit before you torque anything down. Leave the bolts loose until the gate opens, closes and hangs where you want it, then tighten fully.
Installation video
The manufacturer’s own walkthrough of the Silent ‘Gate trunnion set. Watch it on YouTube if you want it full screen.

Rebuilding the whole gate? Our tailgate cables guide, latch kit guide and tailgate saver guide cover the other parts. Cables, latch kits and the Gate Saver strut for these trucks are in our 73-87 Squarebody truck parts collection.
For any questions or concerns with your install, don’t hesitate to email us at support@lsfab.com
Printable instructions
Pick the sheet that matches your truck. They print on letter paper.
0 Comments